Paper Folding


Paper Folding


Materials Needed:
Construction Paper
Scissors
Glue stick or Paste
Crayons or Markers


Presentation
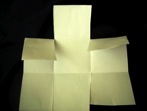
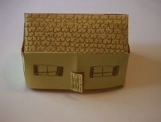
Activity 1: House
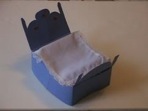
Activity 2: Bed
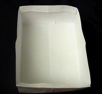
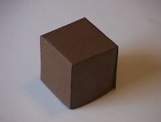
Activity 3: Box
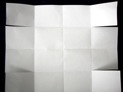
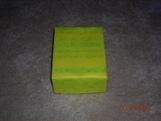
Fold the paper into 16 rectangles as you did before.
Cut along creases on the shorter ends of the paper to the first place where two creases meet. (Do not cut the center fold.)
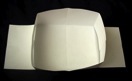
Fold the end rectangles together to form sides of the box and glue together.
Fold up the remaining two ends and glue as you did for the box.
Cut a strip of paper to form a handle, and attach to the sides.
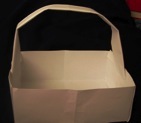
Activity 4: Basket
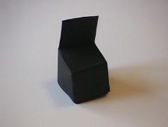
Activity 5: Chair
Start with a square of paper. Fold your square into thirds. Turn the paper, and fold it into thirds again so that you get 9 squares. You will need to show the
children how to do this by measuring,
or by folding the edges in 1/3 of the
distance and creasing.
Cut the creases along two of the sides.
Fold the back of the chair up.
Join the end squares together to form the base of the chair.
Activity 6: Table
Start with a square and fold it into thirds like you did for the chair, until you have 9 squares again.
Cut the creases along the two ends just like for the chair.
Join the end squares together to form the base of the table.
Activity 8: Animals
Children enjoy drawing a simple animal on a folded piece of paper, and then cutting it out so that it can stand. This works well for any animal with a fairly straight back, whether it stands on four legs or two. It is important to place the animal's back along the fold, so it can stand easily.
Show the children how to decorate their animals by curling paper "fur", cutting out and curling triangle fish scales, adding yarn details, etc. They might like to make a tiger, a kangaroo, or a zebra. In fact, they can make a whole "zoo"!

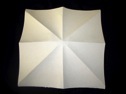
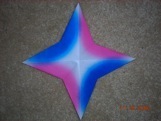
Activity 7: Christmas Star
Using a square of paper (origami
paper or silver or gold foil are
spectacular), make a mountain
fold along the diagonal. Open and
repeat along the other diagonal.
Open and fold paper in half forming
a rectangle. Open and repeat.
Cut 1/3 of the way up the rectangular
folds on each side.
Fold the edges back to the center of
diagonals, forming points of the star.
Repeat until all points are done the same way.
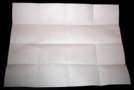
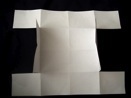
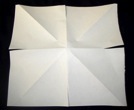
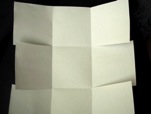
Fold paper in half. Open and fold edges to middle crease.
Turn the paper the other direction and
do the same thing the other way so
you end up with 16 rectangles.
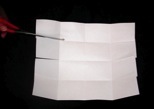
Cut along creases on the shorter ends
of the paper to the first place where two
creases meet.
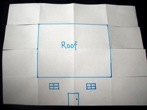
The 4 middle rectangles will form the roof.
On one side, the two rectangles
connecting to the roof that haven’t
been cut can be used to make a
door and windows.
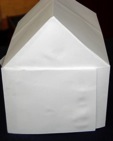
You can cut out or draw a door, windows,
and other details. It is important to do any
coloring or painting before pasting the house together.
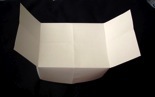
Connect the four rectangles on each
side that you previously cut. You
should connect the inner two first and
glue them together. Then overlap these
with the outer two and glue them together,
forming the sides of the houses.
Fold paper in half.
Open and fold edges to middle crease.
Turn the paper the other direction and do the same thing the other way so you end up with 16 rectangles.
Cut along creases on the shorter ends
of the paper to the first place where two
creases meet. (Do not cut the center fold.)
Bend the pieces you didn’t cut up.
These are the head and foot of the bed up.
Connect the outside rectangles
together and glue.
The head and foot of the bed can be trimmed and shaped if desired.
Fold the paper into 16
rectangles and cut creases
as in the first four steps above.
Fold the end rectangles together
to form sides of the box and glue
together.
Fold up the remaining two ends
and glue. (Fold down the part
that is taller on each side and glue).
Repeat the process using slightly larger paper to make the lid of the box.